
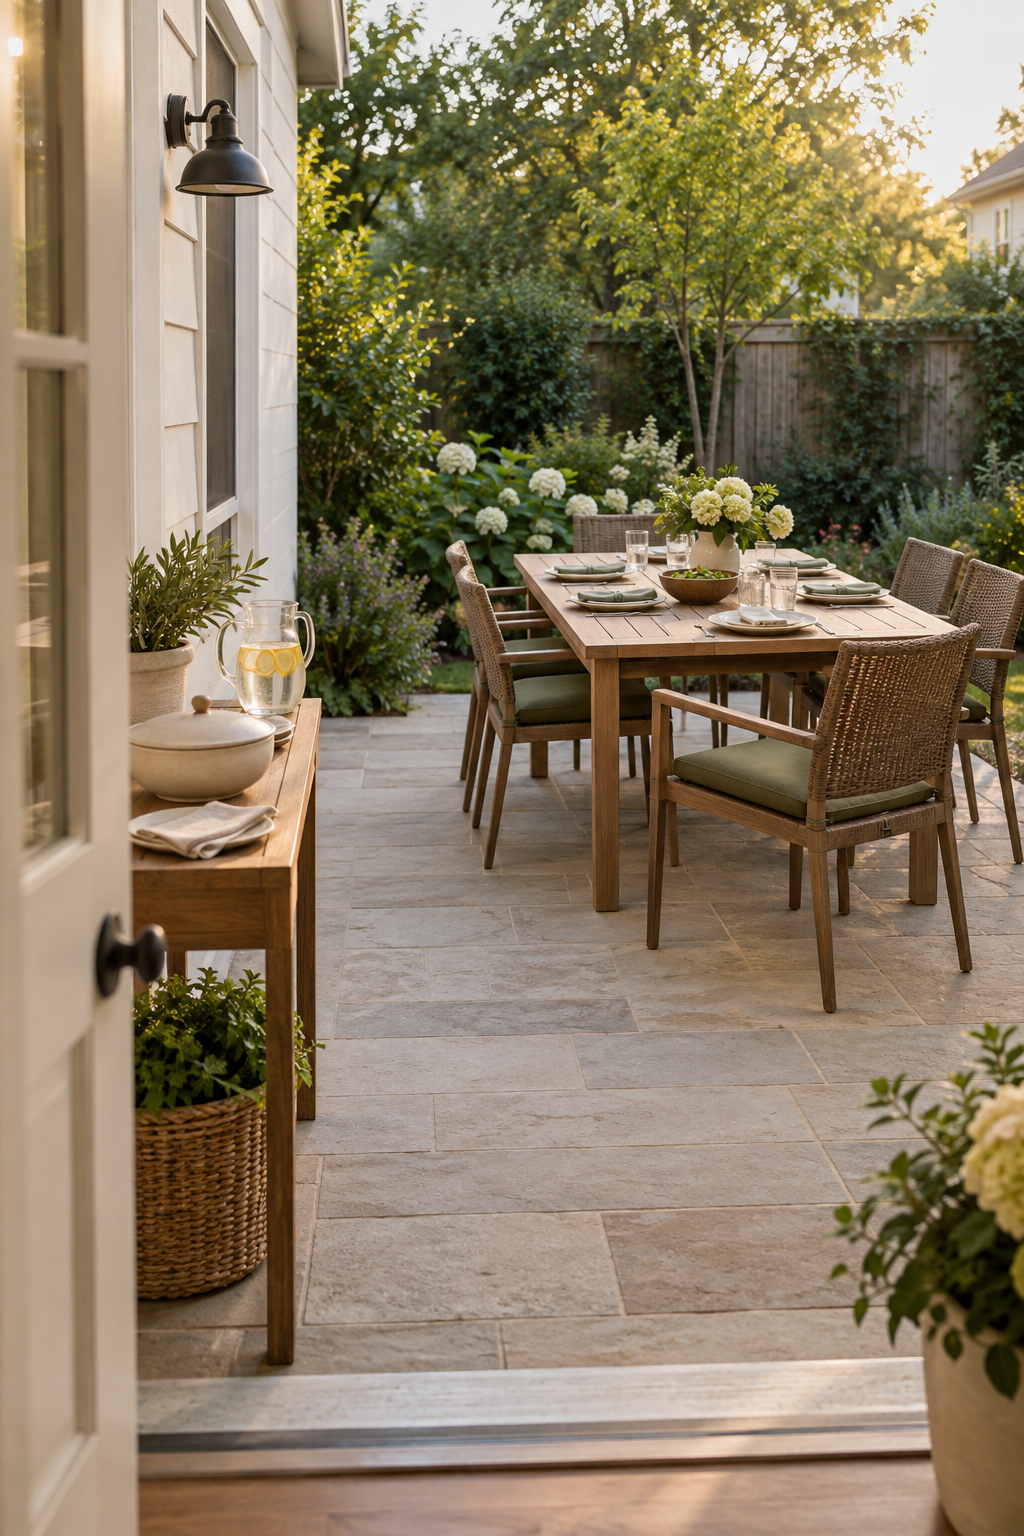
A dining area is not only a table placed on a patio. It is a short operating system between food preparation, serving, seating and cleanup. The layout can look generous when chairs are tucked in yet fail as soon as six people sit down, a hot dish arrives or someone needs to reach the back door. Instead of planning for an idealized dinner party, test three real meals and let their movement reveal what the space needs.
Write three meal briefs
Choose the meals that represent normal life, peak capacity and difficult conditions. Give each one a guest count, menu type, serving method, time of day and weather limit. This is the dining equivalent of a dress rehearsal: it replaces vague intentions with observable tasks.
Usually two to four people, carried from the kitchen and cleared in one trip or two. This decides whether the area will be used on ordinary weekdays.
Use the maximum number you expect several times a year—not the largest crowd the yard could theoretically hold.
Add low light, sun, wind, insects or temperature. Define the point at which the meal should move indoors.
Then decide whether food is plated inside, served family-style or placed on a buffet. Each method creates a different space requirement. Family-style dishes consume tabletop area. A buffet needs a stable, food-suitable landing away from the walking line. Indoor plating increases trips through the door. Avoid buying a serving cart before the method is clear; it may simply add another object to store and steer around.
Record who uses the space. A chair, route or threshold that is manageable for one household member may not work for a child, older guest or someone using a mobility aid. The residential plan does not need to imitate a commercial restaurant, but it should support the people actually invited without requiring them to squeeze behind occupied chairs or cross the cooking zone.
Draw the complete service loop
Stand where food is prepared and trace the meal in both directions. The shortest route is not automatically the best: a direct line through the grill operator’s working area or behind tightly spaced chairs creates conflict. The preferred loop is clear, visible, well lit and separate from heat where the exact appliance instructions require it.
Identify where cold food, cooked food, drinks and tableware begin.
Open the door fully and carry a tray across every threshold, step and turn.
Set dishes down without placing hot or wet items on an unsuitable surface.
Reach every place without leaning across flames, railings or seated guests.
Separate leftovers, waste and dishes and take them back without blocking arrivals.
Protect the doorway first. Mark its full swing and the standing space needed to operate it while carrying something. Sliding and folding doors also have tracks, panels and pinch zones that must remain clear. Keep mats flat and suitable for the exterior surface. If the route includes stairs, changes of level or a dark threshold, solve that before adding decorative furniture.
A small landing surface close to the kitchen can remove repeated conflicts at the dining table. It can hold a covered dish, water pitcher or empty tray while the main table remains comfortable. Confirm the product’s stability, weather suitability, cleaning method and storage position. Do not use a decorative console for hot cookware unless its manufacturer permits that exact use and the surface is protected as directed.
Set the table at full size before choosing it
Use manufacturer dimensions to tape the tabletop on the ground. Add every chair at its occupied position, not pushed neatly underneath. Sit at each place using available chairs or sturdy stand-ins. Check elbow room, table-leg conflicts, the ability to sit and stand, and the route behind every occupied seat.
| Test position | What to place at full size | Question to answer | Typical correction |
|---|---|---|---|
| Everyday setting | Normal seats, plates, water and the dishes used most often | Can this meal happen without clearing decorative objects first? | Reduce permanent place settings and keep the center flexible |
| Full-table setting | All intended chairs plus shared dishes or serving boards | Can everyone sit, stand and pass without moving another person? | Use fewer permanent seats or a different serving method |
| Door-side seat | Chair fully occupied while the door opens and a tray passes | Does one guest become a gatekeeper for the house? | Shift or rotate the table and protect a dedicated route |
| End positions | End chairs, table legs, umbrella base where applicable and serving access | Do the “extra” seats work as real seats? | Buy for the dependable capacity, then add flexible guest seating elsewhere |
| Cleanup position | Chair backs, waste container, empty tray and storage access | Can dishes leave while people remain seated? | Create a return landing or reverse the service direction |
Use the outdoor-furniture guide to compare material, exposure and storage after the dining envelope works. Avoid solving a cramped table with a narrow bench by assumption. A bench can tuck away visually, but users still need room to approach, sit and leave; the people in the middle may depend on others moving.
Run the dining plan as three rehearsals
Leave the taped layout in place and conduct each service with empty dishes, pitchers and trays. The goal is not speed. It is to expose crossings, awkward reaches and objects that have no safe landing.
The ordinary dinner
Carry a typical meal from preparation to table, pour drinks, retrieve one forgotten item and clear the dishes. If this requires furniture to be moved twice or the door to be propped unsafely, the dining area will feel like an event setup rather than an everyday room.
Could one tray or a nearby landing simplify the route?
Does it stay operable with every chair occupied?
Can the table and cushions be returned without delay?
The full-table gathering
Fill every planned position with a person or full-size chair envelope. Add the shared dishes, ice bucket or centerpiece you genuinely use. Ask someone to arrive late, leave the table and help clear. If the layout only works while everyone remains seated, reduce capacity or separate dining from overflow seating.
Can a guest reach an open chair without shifting the table?
Are dishes passed safely without crowding the edge?
Does equipment noise or smoke dominate the table?
The after-dark close
Repeat the route at the likely finishing time. Check that faces, food, steps, thresholds and the cleanup path can be seen without harsh glare. The dedicated outdoor-lighting guide will address layers and installation; for now, define what needs light and where glare or shadows appear. Use listed outdoor products and qualified electrical help where required.
Can lighting be controlled before stepping into darkness?
Does a person carrying dishes cast shadow on a step?
Can loose items be stored and the door secured promptly?
Keep food safety and weather inside the plan
The dining layout should help food spend less time waiting outside. USDA guidance identifies 40°F to 140°F as the temperature “Danger Zone.” For an outdoor gathering, keep cold perishable food at or below 40°F and hot food at or above 140°F. Perishable food should not remain out for more than two hours—or more than one hour when the outdoor temperature is above 90°F. Follow current official advice and discard food when its safety is uncertain.
Cold service
Keep food refrigerated until needed or use a suitable cooler with adequate cold sources. Place cold dishes over ice when the serving plan requires it, keep them shaded and avoid repeatedly opening the main food cooler for drinks.
Hot service
Cook foods to their safe internal temperature and verify with a suitable food thermometer. Use manufacturer-approved holding equipment where required; do not improvise electrical or flame-based warming under a covered structure or beside combustible items.
Clean separation
Keep raw and ready-to-eat foods, plates and utensils separate. Give handwashing, serving utensils and used-dish return a defined place rather than letting the dining table become a preparation surface.
Weather exit
Set a clear trigger for moving indoors: unsafe wind, lightning, excessive heat, unstable shade equipment or any condition outside product instructions. Secure loose items and never shelter beneath unsuitable structures during severe weather.
Insects should be handled with food covers, prompt cleanup and current local public-health guidance. Do not position candles, torches or repellents beside food without checking their exact instructions. Drain standing water and avoid creating hidden water traps beneath covers or furniture.
Approve the plan from the final tray backward
Finish at the moment the last dishes return indoors. The door closes, chairs are reset, cushions and table linens go to their correct storage, food is handled safely and no temporary light, cord or serving piece remains in the route. Work backward from that state and list the equipment actually required.
The dining-area sign-off
- The everyday and full-table capacities are written separately.
- The occupied table, chair movement and door swing have been tested full size.
- The food route does not cross the appliance’s prohibited or working area.
- There is a stable landing for arriving and returning dishes.
- Cold, hot and used-item handling follows current food-safety guidance.
- Lighting covers faces, food, thresholds and cleanup without glare.
- Weather limits and the person responsible for close-down are clear.
- Every loose item has a realistic storage and drying position.
Only after this sign-off should styling complete the space. A washable tablecloth, restrained centerpiece or serving tray can improve a proven setup. None compensates for a blocked route, an unusable guest seat or food left waiting in the sun.
Useful after the rehearsal
Verify temperature, then compare the supporting pieces
The ThermoPro TP19H instant-read thermometer is a relevant candidate for checking cooking temperatures during outdoor meals. The current listing specifies a folding probe, rotating display and Fahrenheit/Celsius readings. Follow its instructions, clean it as directed and use current USDA safe-temperature guidance for the specific food—it does not replace safe holding, clean separation or time control.
As an Amazon Associate, The Smart Life Edit earns from qualifying purchases at no additional cost to you. Confirm current specifications, instructions and suitability before purchase.Sources checked for this guide: USDA guidance for summer cookout food safety, USDA FSIS guidance on the 40°F–140°F Danger Zone and the current exact-model product listing linked above. Exact appliance, lighting and product instructions and applicable local requirements take priority.