
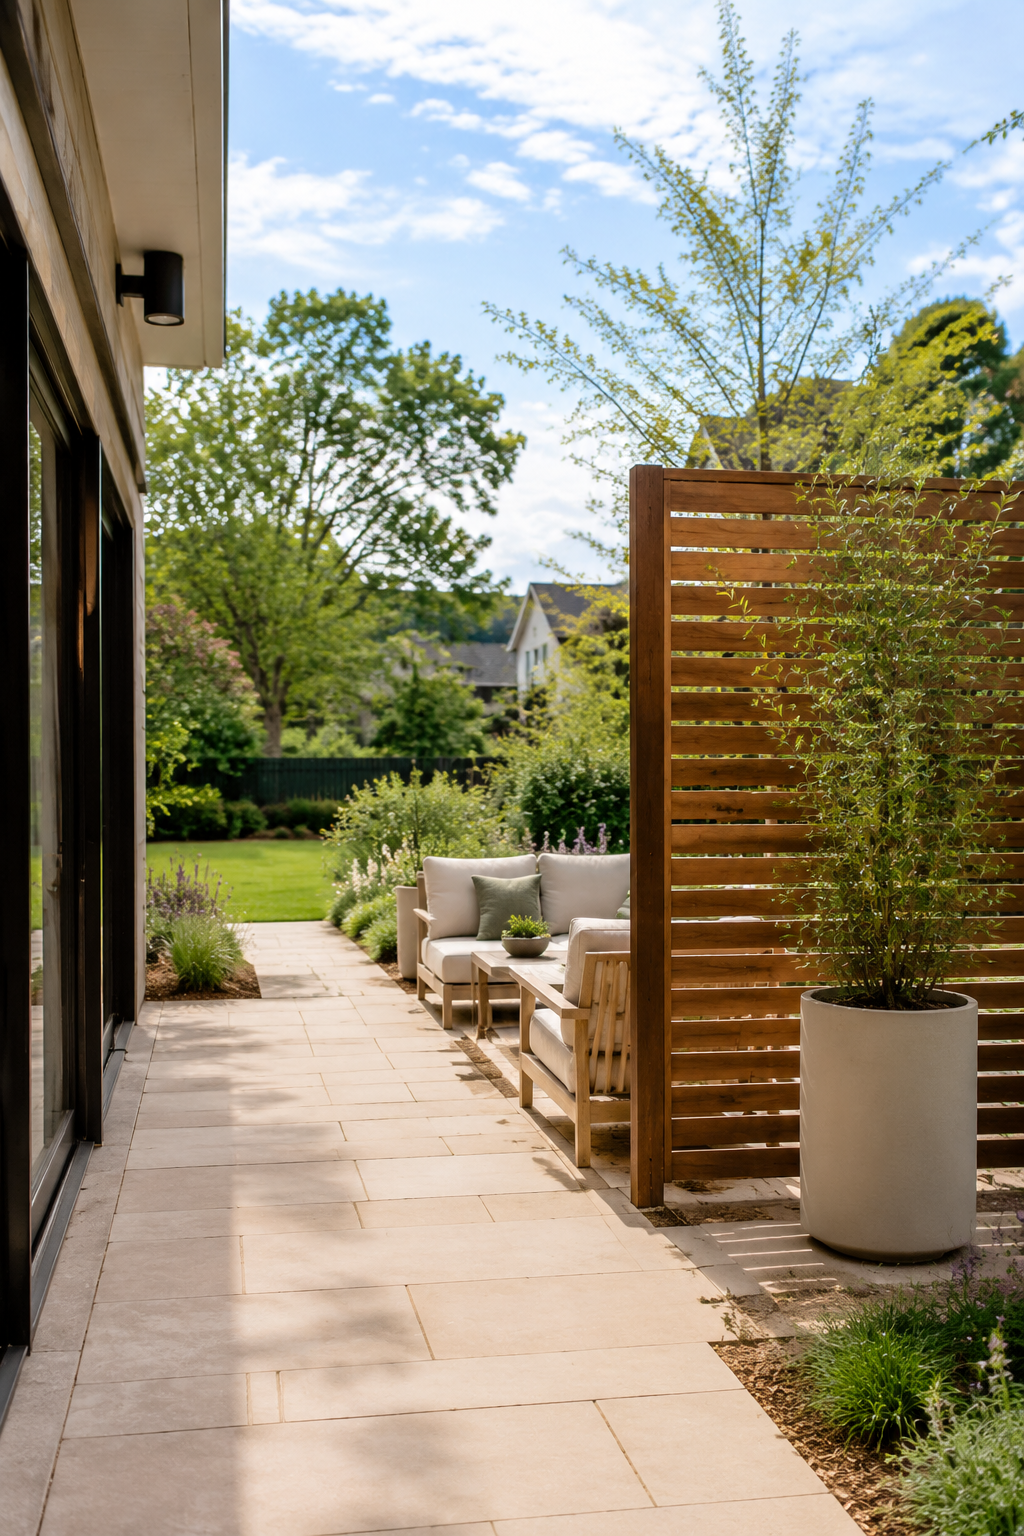
Privacy is not the same as total enclosure. Most backyards have one or two uncomfortable views: a neighboring upper window toward a dining table, a sidewalk toward a lounge chair or a direct line from the house into the seating area. Map those views at the height and time they occur, then block only what needs blocking. The result can feel calmer without becoming darker, windier or visually smaller.
Write a one-view privacy brief
Begin with one sentence: “Provide privacy for this activity, from this viewpoint, during these hours.” A dining table used at 7 p.m. may need a different response from a daytime reading chair. A screen positioned for seated privacy may not need to reach the height of a full boundary fence.
Name the chair, table, cooking position or doorway—not the entire yard.
Record the neighboring window, sidewalk, driveway or adjacent seating position.
Note season, hour, foliage, sun angle and whether indoor lights increase visibility after dark.
Also decide what must remain visible. This might be the far end of the garden, the sky, children’s play space, the route from the back door or a valued tree. Those “keep” views are part of the brief. A solution that blocks the unwanted sightline but also removes supervision, natural light or the only long view has not solved the whole problem.
Map the view at three heights
Photograph the area from the actual viewing positions with permission and without intruding on anyone else’s privacy. Use painter’s tape, a garden cane or a helper holding cardboard to mark where a screen would intercept the line. Repeat the test at three heights because a panel that works from a dining chair may fail when someone stands—or may be unnecessarily tall when viewed from inside.
From the activity
Check the view while seated and standing at the exact chair, table or counter. Mark the lowest and narrowest area that breaks visual contact.
From the source
Estimate the line from the sidewalk, adjacent lot or upper window using lawful observation from your own property. Do not rely on a single ground-level angle.
From inside the home
Look through the doors and windows that face the yard. Preserve daylight, garden depth and the view needed for supervision or security.
Along the route
Walk from door to seating, storage and gate while carrying a tray or cushion. Keep the screen, planter and its mature growth outside the required path.
Test morning, afternoon and evening. Deciduous planting may screen well in summer but become transparent after leaf drop. Nighttime indoor lighting can also reverse the privacy condition: a reflective window by day may reveal the room after dark. Curtains or interior shades may be the smallest answer for that specific view.
Climb the screening ladder one rung at a time
Use the least permanent layer that meets the brief. Each rung adds cost, maintenance and site consequences, so retest the sightline before moving upward.
Reorient the activity
Turn seating, swap the table and lounge zones or move the focal point so people naturally face the open view rather than the neighboring property.
Add a localized movable layer
Trial a suitable planter or screen only where needed. Verify its full dimensions, weight, base, drainage, wind instructions and safe route clearance.
Use a planted filter
Choose a species for the local climate, soil, sun, water, mature width and maintenance capacity. Space it for mature growth rather than an instant dense wall.
Build a fixed partial screen
A slatted or framed element can target one view while allowing some light and air, but its posts, foundations and wind loads require proper design and installation.
Change the boundary
Use a fence or substantial planted boundary only after the property line, ownership, easements, visibility rules, permits and community requirements are confirmed.
Plants are not dimensionless decor. University of Minnesota Extension recommends selecting trees and shrubs for the actual soil, moisture, pH, available space and sun exposure. Local extension services or a qualified horticultural professional can identify species for the site. Avoid presenting one fast-growing evergreen as a universal privacy solution; mature size, roots, disease, water demand and regional suitability vary.
Protect the qualities that make the yard feel open
Compare each option against four resources: light, air, floor and depth. A dark solid panel close to the house may reduce daylight indoors. A wide planter can narrow circulation. A tall continuous fence can remove the long diagonal view that made a small yard feel larger. A solid barrier may also change wind patterns rather than simply stop wind.
| Privacy layer | What it can preserve | What to test | Common failure |
|---|---|---|---|
| Furniture orientation | All floor area and most daylight | Comfort, route and view from inside | The new angle blocks circulation |
| Tall container planting | Open sky and a movable layout | Mature size, weight, drainage, wind and winter care | Container is unstable or plant outgrows it |
| Slatted partial screen | Filtered light and selected glimpses | Slat direction, wind load, fixings and changing sun | Pattern looks open from one angle but not another |
| Mixed planted screen | Seasonal texture and visual depth | Climate, soil, water, mature spread and leaf drop | Planted too tightly for mature growth |
| Solid boundary fence | Consistent low-level screening | Code, ownership, grade, wind, drainage and shadow | Creates a dark perimeter box |
Staggering two short elements can interrupt a diagonal sightline more effectively than one long wall. Leaving deliberate gaps toward the best view preserves depth. If the screen is near a window, mock up its full height and opacity indoors as well as outside before approving the design.
Complete the boundary, utility and maintenance checks
Confirm the property line through the appropriate survey or property documents rather than assuming an existing fence is correctly placed. Check the local building or planning department, easements, corner-lot visibility rules, pool-barrier requirements, homeowner association or condominium rules, and lease conditions. Requirements vary: Austin, Texas, for example, publishes a permit trigger for certain fences over six feet along a public right-of-way, but that example is not a rule for another municipality.
Before digging for posts, trees or shrubs in the United States, contact the state 811 center within its required notice period. The national 811 guidance specifically includes planting trees and shrubs and installing fences. Public markings may not identify every privately owned irrigation, lighting or utility line, so clarify the limits of the locate and use the appropriate professional where needed.
- Wind: use the exact screen or planter manufacturer’s anchoring and weather instructions; obtain structural advice for fixed or exposed installations.
- Drainage: keep designed falls, drains, vents and access points clear. Do not direct planter runoff toward the building or neighboring property.
- Plant health: plan watering, pruning, leaf collection and replacement access at mature size.
- Fire exposure: in wildfire-prone locations, follow the current local defensible-space and material rules. CAL FIRE advises removing dead vegetation and spacing plants and combustible items; local requirements take priority.
- Shared boundaries: communicate early, but do not treat informal agreement as a substitute for confirmed ownership, permissions or required approvals.
Run a seven-day full-size privacy test
Build a temporary, safely supported mock-up within your property using a lightweight material that will not become a wind hazard. Do not leave it unattended or use it in adverse weather. Match the proposed height, width, position and approximate opacity; then live with it for a week.
Check seated, standing, indoor and route views at the times written in the brief.
Record indoor shadow, patio comfort, glare and any redirected gusts around the edges.
Carry food, open doors, supervise the yard and complete storage or maintenance tasks.
Shorten, lower or shift the mock-up until it is the smallest version that still works.
Only then choose the material, planting or permanent construction. Record exact finished dimensions, post or base locations, access for maintenance and the approvals or professional input required. Privacy should feel like a carefully placed filter—not a reflexive wall around every edge.
Shop after the sightline test
Browse the Outdoor Living edit
The broad collection can help compare planters and supporting outdoor accessories once the required dimensions, wind exposure, drainage and maintenance plan are known. No freestanding privacy screen is recommended generically because stability and installation depend on the exact site and model.
As an Amazon Associate, The Smart Life Edit earns from qualifying purchases at no additional cost to you.Sources checked for this guide: national 811 before-you-dig guidance, the University of Minnesota Extension guide to selecting trees and shrubs for site conditions, Austin Development Services fencing regulations as one example of local variation, and CAL FIRE defensible-space guidance. The applicable local code, property documents and exact manufacturer instructions take priority.