
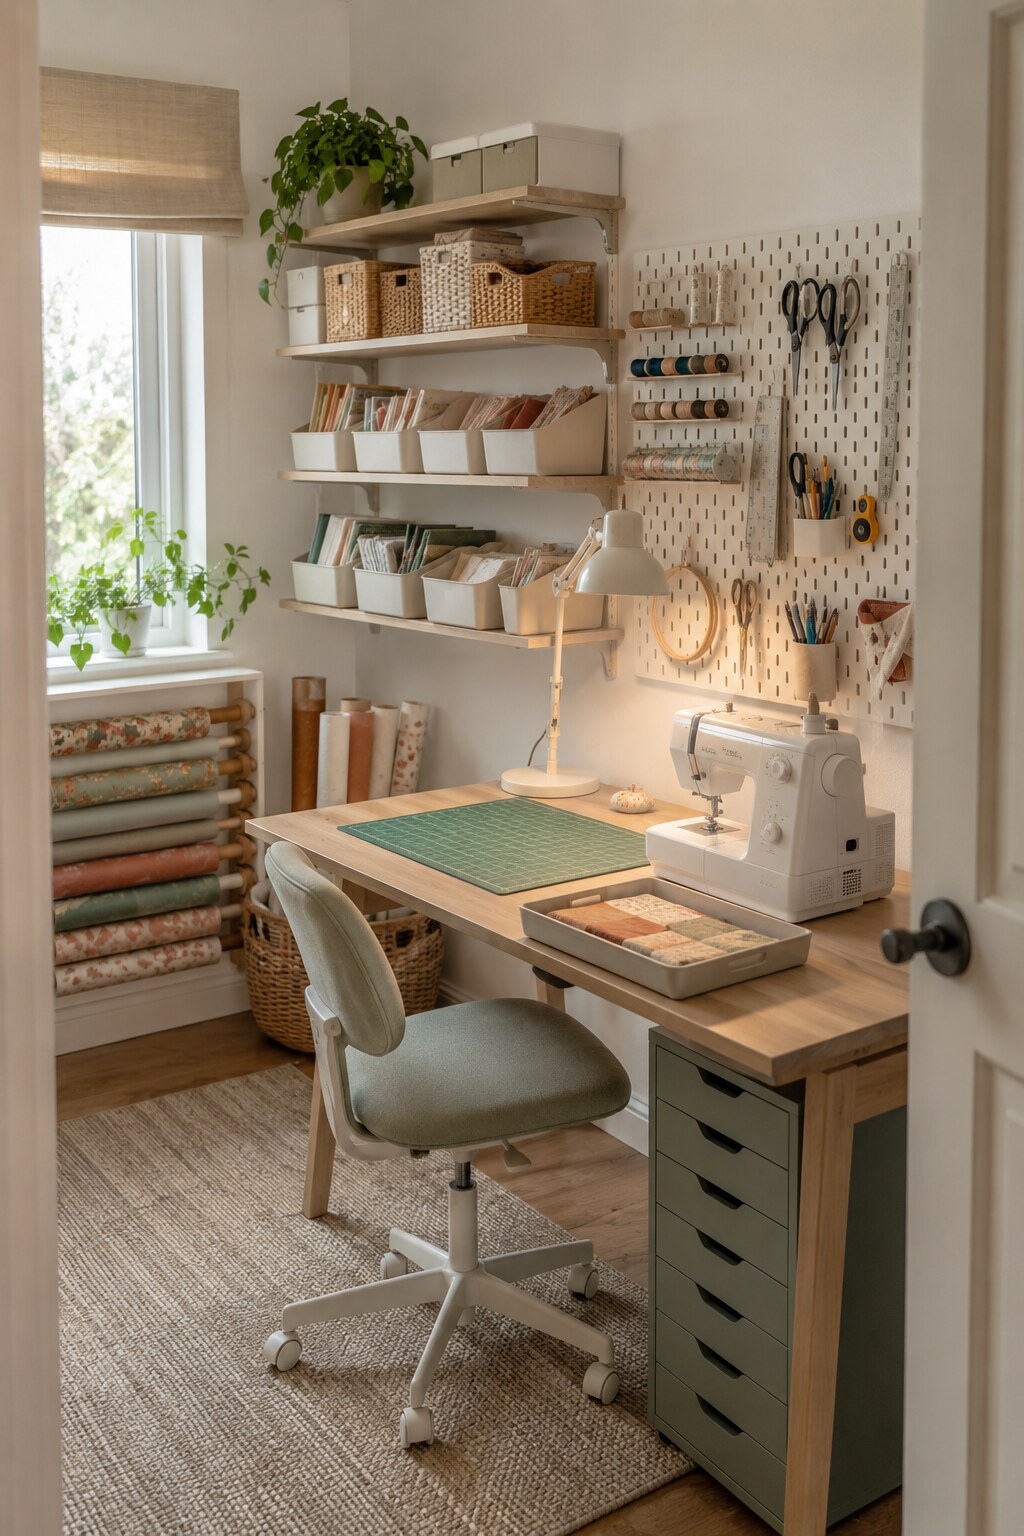
A useful craft room is not arranged by color or container collection. It is arranged by what materials do: fabric folds, paper bends, paint leaks, rolls unwind, blades need control and unfinished work needs somewhere to pause. Design for those behaviors first, then make the room attractive.
By The Smart Life Edit — product guidance uses current manufacturer specifications and retailer details. No hands-on testing is claimed unless stated. Read our editorial standards →
THE MATERIAL LIBRARY
Store each supply by the way it behaves
Paper, vinyl and pattern pieces
Keep sheets supported across their full width. Shallow drawers, vertical magazine files and portfolios prevent corners from curling while keeping formats visible.
Boundary: separate full sheets, scraps and templates so small pieces do not bury usable stock.Fabric, felt and interfacing
Use broad categories that can be scanned without pulling out every stack. Vertical folds, shallow shelves or contained bundles reduce hidden layers.
Boundary: record yardage or project purpose before a folded remnant becomes anonymous.Wrapping paper, ribbon and long media
Store rolls horizontally with end support or vertically inside a tall, stable boundary. Keep frequently used ribbon where it can unwind without tangling.
Boundary: avoid unsupported tall rolls where they can tip into a walking route.Beads, buttons and embellishments
Small transparent cases work when each category is valuable enough to retrieve individually. Too many micro-compartments can make cleanup slower than the craft.
Boundary: contain by project or material family before sorting every color.Needles, blades and cutting tools
Give sharp tools a closed, clearly controlled home outside casual reach. Magnetic containment can help with compatible small metal pieces but does not replace safe handling.
Boundary: count loose blades and needles before and after work where children or pets use the room.Paint, ink, glue and ceramics
Use wipeable trays, upright bottles and a protected drying area. Separate products that require ventilation, secure lids or manufacturer-specified temperature storage.
Boundary: do not place leaking or breakable supplies above seating or electrical equipment.THREE STUDIO PROFILES
Match the room to how permanently it can stay creative
The working studio
- Keep available
- A protected work surface, current tools, project parking and deeper inventory arranged around the main craft.
- Useful layout
- One production wall, one materials wall and one clear route between door, chair and storage.
- Avoid
- Filling every wall with shallow display storage that leaves no calm visual field.
The sewing or hobby nook
- Keep available
- The machine or primary tool, task light, daily notions and one active-project tray.
- Useful layout
- A slim drawer unit under the table, a contained vertical tool panel and reserve stock elsewhere.
- Avoid
- Permanent floor bins that obstruct the chair or turn work calls and sleep into storage negotiations.
The pack-away studio
- Keep available
- A portable project kit, a surface protector and a nearby cabinet or cart with a fixed footprint.
- Useful layout
- One case per craft type plus a clearly defined temporary drying or cooling place.
- Avoid
- Expecting a complex project to return to dozens of distant containers after every session.
THE SURFACE BUDGET
Reserve space for making, not permanent storage
Measure the largest normal task, not the empty table. A sewing machine needs fabric to feed and exit; paper craft needs space to rotate sheets; painting needs a protected wet zone and somewhere finished work can dry.
Production surface
Keep only the tool and materials required for the current action. Store refills and alternatives within reach but off the table.
Cutting surface
Check the mat, fabric or paper dimensions and keep the full cutting path clear. Large mats need flat support and a safe storage position when not in use.
Reference surface
Patterns, instructions and inspiration need a clean, visible place away from paint, blades and moving fabric.
Drying or cooling surface
Wet media, glue, heat tools and pressed fabric should not compete with the next activity. Use a protected, ventilated area appropriate to the material.
If beginning a normal project requires moving more than three unrelated storage items, the work surface is acting as a shelf rather than a workstation.
PROJECT-STATE PARKING
Let unfinished work pause without losing its place
Organize projects by state rather than hiding every component back in general inventory. The goal is to make restarting obvious while preventing one abandoned project from occupying the whole room.
Keep the current project on one shallow tray, board or open case with the next required action visible.
Contain work awaiting drying, a missing material or another person. Add the reason and review date rather than leaving it ambiguous.
Bag or box every component together, include a short project note and assign a firm capacity for paused work.
Move the object to display, gifting, photographing, filing or use. Return surplus materials to inventory and remove waste immediately.
A project tray should preserve momentum. It should not become permanent evidence of every idea you may finish one day.
CRAFT-SPECIFIC FILES
Use a different storage logic for each kind of making
Feed, cut and press
- Keep together
- Current fabric, pattern, thread, notions and machine settings for one project.
- Best boundary
- Fabric by useful cut or project family; notions shallow and visible; patterns supported flat.
- Protect
- Needles, rotary blades, irons, cables and the fabric feed path around the machine.
Protect edges and see small stock
- Keep together
- Full sheets, scraps, adhesives, cutting tools and one portable embellishment case.
- Best boundary
- Paper by size first, then broad purpose; scraps limited to a container with a minimum usable size.
- Protect
- Paper from moisture, sunlight, curling and adhesive residue.
Separate clean, wet and drying
- Keep together
- Compatible paints, brushes, water containers, palette and surface protection.
- Best boundary
- Upright bottles on wipeable trays with labels visible and a defined drying shelf.
- Protect
- Ventilation, manufacturer storage guidance, sinks, fabrics and electrical equipment.
Control length and seasonal volume
- Keep together
- Current paper, ribbon, tape, tags and scissors near the surface used for wrapping.
- Best boundary
- Everyday supplies separate from seasonal backstock; rolls supported so edges remain usable.
- Protect
- Walking routes, roll ends and delicate decorations from crushing.
THE VISIBILITY LADDER
Display only what improves retrieval
| Visibility level | Use it for | Benefit | Limitation |
|---|---|---|---|
| Open and visible | Daily tools with a safe, stable home | Fast retrieval and return | Collects dust and creates visual load |
| Clear contained | Small supplies that need identification | Inventory stays readable | Mixed colors can look busy |
| Opaque labeled | Reserve stock and visually noisy categories | Creates a calmer field | Requires an accurate broad label |
| Closed secure | Blades, needles, chemicals and fragile items | Controls access and movement | Adds an action to retrieval |
| Archived elsewhere | Rare crafts, bulk stock and paused projects | Protects the working studio | Needs a reliable inventory note |
A pegboard is useful only for tools that fit its safe load, are used frequently and can be returned without creating a sharp or unstable display.
LIGHT, POWER AND ACCESS
Plan the technical layer before filling storage
Task light misses the work
Position light to reduce shadows from the working hand and machine. Check glare on rulers, glossy paper and cutting lines before fixing a lamp permanently.
Cables cross the chair route
Keep outlets, machine leads and chargers away from wheels, heat and cutting paths. Do not overload extensions or conceal equipment requiring ventilation.
Sharp tools look decorative
Scissors and rulers may suit visible storage; blades, pins and needles require containment appropriate to the household and manufacturer guidance.
Paint and glue share textile storage
Separate staining or leaking media from fabric and paper. Use wipeable trays and keep lids, hazard information and ventilation requirements intact.
Heavy stock sits overhead
Move machines, paper stacks and dense containers between knee and shoulder height where possible. Secure shelves to the correct substrate and respect load limits.
Children share the space
Define independent-access supplies separately from adult-controlled tools and materials. A high shelf alone may not provide adequate security.
THREE TARGETED TOOLS
Products for three different craft constraints
These products solve separate problems and are not intended as a matching storage system. Confirm current dimensions, materials and safety guidance against your real supplies before ordering.
Fiskars 24 × 36-inch self-healing cutting mat
The large grid surface supports full-width fabric, long strips and larger paper projects while giving rotary cutting a defined work zone.
Limitation: A 24 × 36-inch mat needs full flat support and a safe flat or manufacturer-approved hanging position. It is too large for many shared dining tables and does not replace blade safety.
View on Amazon ↗IRIS USA 16-case photo and craft keeper
The outer case holds sixteen individual 4 × 6-inch cases, allowing stamps, stickers, thread cards or project components to remain separated and portable.
Limitation: The small inner cases suit only genuinely small categories. Subdividing everything can slow cleanup, and the complete outer case needs roughly 15 × 12 × 5 inches of shelf space.
View on Amazon ↗ArtBin Sew-Lutions slim magnetic box
The compact polypropylene case uses a magnetic base to help contain compatible pins, needles and small metal pieces inside a portable closed box.
Limitation: Its listed size is approximately 7.4 × 3.6 × 0.7 inches, so it is a specialist small-item case rather than general sewing storage. Keep it securely closed and outside unsuitable access.
View on Amazon ↗As an Amazon Associate, The Smart Life Edit earns from qualifying purchases. Recommendations are selected for the constraint they may solve, not because every craft room needs more containers.
THE CLOSE-AND-REOPEN TEST
End the session without erasing momentum
At the close
Make the room safe, then preserve the next action
Count and secure sharp tools, close wet media, switch off heat and powered equipment, clear the chair route and move waste to its exit. Place the active project on one tray with the next tool or instruction visible.
Secure hazards, close lids, remove drinks and place every loose project component on its tray.
Add offcuts to their capacity boundary, return shared tools and wipe the production surface.
The next action is visible, the required tool is accessible and the surface does not need a full-room reset.
Review abandoned projects, duplicate tools and materials that have degraded or lost a defined use.
QUICK ANSWERS
Craft-room organization questions
How do I organize a craft room with many different hobbies?
Give each hobby one broad home, then create shared zones for universal tools, work surfaces and project parking. Let the most frequently used craft keep the easiest reach space.
What is the best way to store fabric?
Choose a method that keeps useful cuts visible without crushing them: shallow folded stacks, vertical folds or project bundles. Record yardage and separate anonymous scraps from usable pieces.
How do I organize craft supplies in a shared room?
Keep one portable active-project kit and a fixed cabinet, closet or cart footprint. Store hazards securely and define where drying or cooling can happen without occupying the shared table indefinitely.
Should craft supplies be stored in clear containers?
Use clear containers when seeing inventory prevents duplicate buying. Choose opaque labeled storage for visually noisy reserve stock, and closed secure storage for hazardous or fragile items.
How can I keep unfinished craft projects organized?
Use one tray, board or case per active project, include the next required action and limit paused work to a fixed capacity. Review anything waiting without a clear reason or date.